Audience: CMS Users
If you would like to add links to your website or marketing emails that open the Online Planner to a specific view rather than the Home tab, follow the instructions below.

URL that opens a particular tab in your Itinerary Planner
Imagine, we wanted a link the opens our Planner directly to the Program
- In the Conference App Builder > Design > Tab Layouts > Planner Tabs, you will see the tab layout editing option with the label, the tab action, if it is enabled or hidden, and also a copy icon.
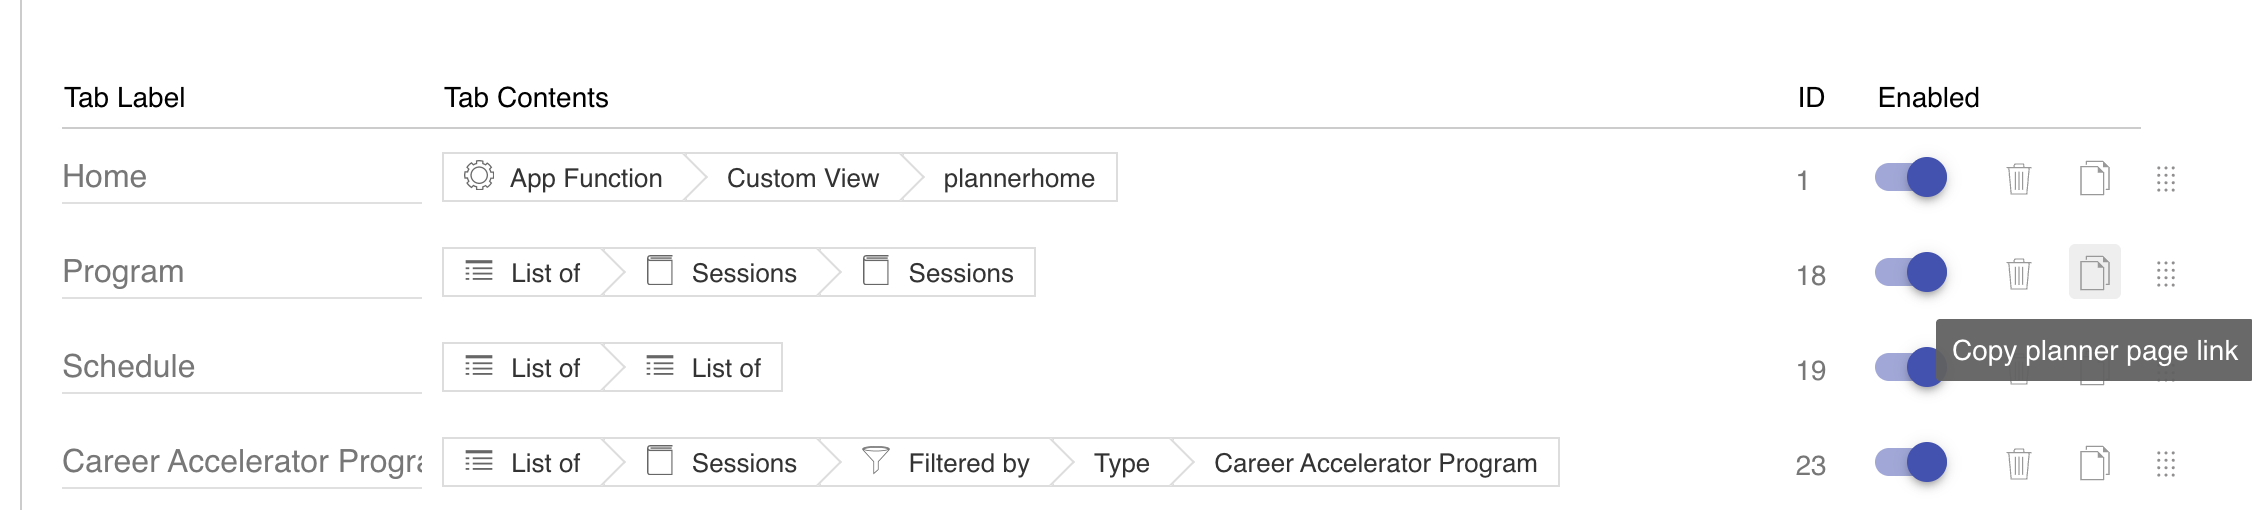
- Click the copy icon to copy the URL to your clipboard
- Paste the link in a new browser window to test it - it should open to the correct planner tab
The tab must be enabled in order to link to it.
Automatic matching from Planner Home in 9.3.9+
Available in 9.3.9 and later. Automatic Planner tab matching applies when your event project uses version 9.3.9 or later. Projects on earlier versions keep their existing navigation behavior.
A builder button or image can keep its normal destination action. If that destination has an equivalent configured Planner tab, clicking the control selects the existing tab. For example, a Program-by-day action can select the Program tab without entering its tab ID.
- The destination tab must be enabled and available to the attendee's user type.
- Tabs under More are included, even while the menu is closed.
- If no equivalent tab is available, the action follows its normal destination/overlay behavior. This fallback applies to destination actions; an explicit link to a disabled tab cannot select that tab.
- Do not assume a filtered list or an individual item will select a general tab. Test the intended destination separately.
- Go to Design > Home Screens > Planner Home and open the home-screen editor.
- Edit the button or image and choose its intended destination in the Action Builder.
- Save and publish to proof. Previously generated views require this save and publication to receive the updated navigation behavior.
- Open the published Planner proof, return to Home with no overlay open, and click the control. Confirm the correct tab is selected, or the intended fallback view opens.
To choose a particular tab explicitly, use Planner Tab as described below. Earlier project versions retain their existing navigation behavior. The copied Planner URLs used on websites and in marketing emails remain the direct-link method described above.
Choose a specific Planner Tab explicitly from Planner Home
When building your home screen for the Planner, you can link a button directly to a tab:
- In the Conference App Builder, navigate to Design > Home Screens
- Select the tab Planner Home
- Click the Edit Planner Home Screen button
- Click the Pencil icon on the button object that you wish to link to a tab
- Choose Planner Tab and then select which of your active tabs should open
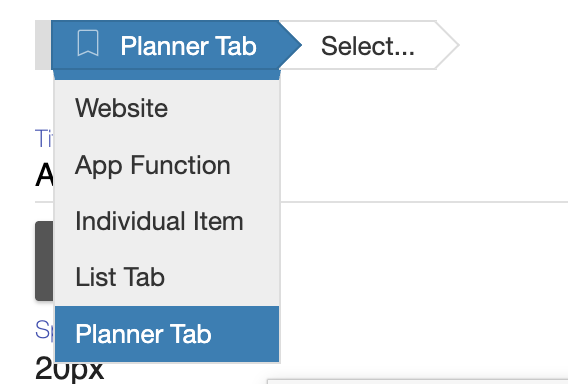
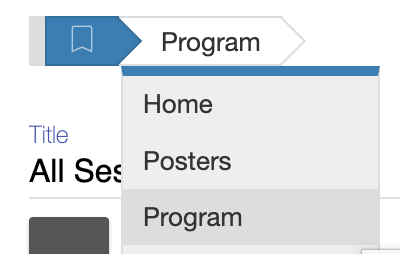
Note: The tab must be an enabled visible tab. If you disable the tab, the button will not be able to link to it. - Publish to proof and test your new link that now jumps directly to the specified tab in the planner.
You can control the available planner tabs via Design > Tab Layouts > Planner Tabs
URL that loads a custom view page in the Itinerary Planner
You can construct a specific URL with just a few parameters. Imagine, you'd like to encourage your exhibitors to post any open positions in the job board before the conference starts. You'd want to send them a link that opens the Jobs Discussion Board directly within the itinerary planner.
The URL structure would be:
https://server.ativ.me/web/planner.php?id=CONFID&table=custom&tid=customviewid
How to construct this URL
- Find the server and CONFID
- In the App Builder, navigate to Distribution > Attendee Links and open the Desktop Planner Link
- The address bar will show you the server and your event ID (CONFID)
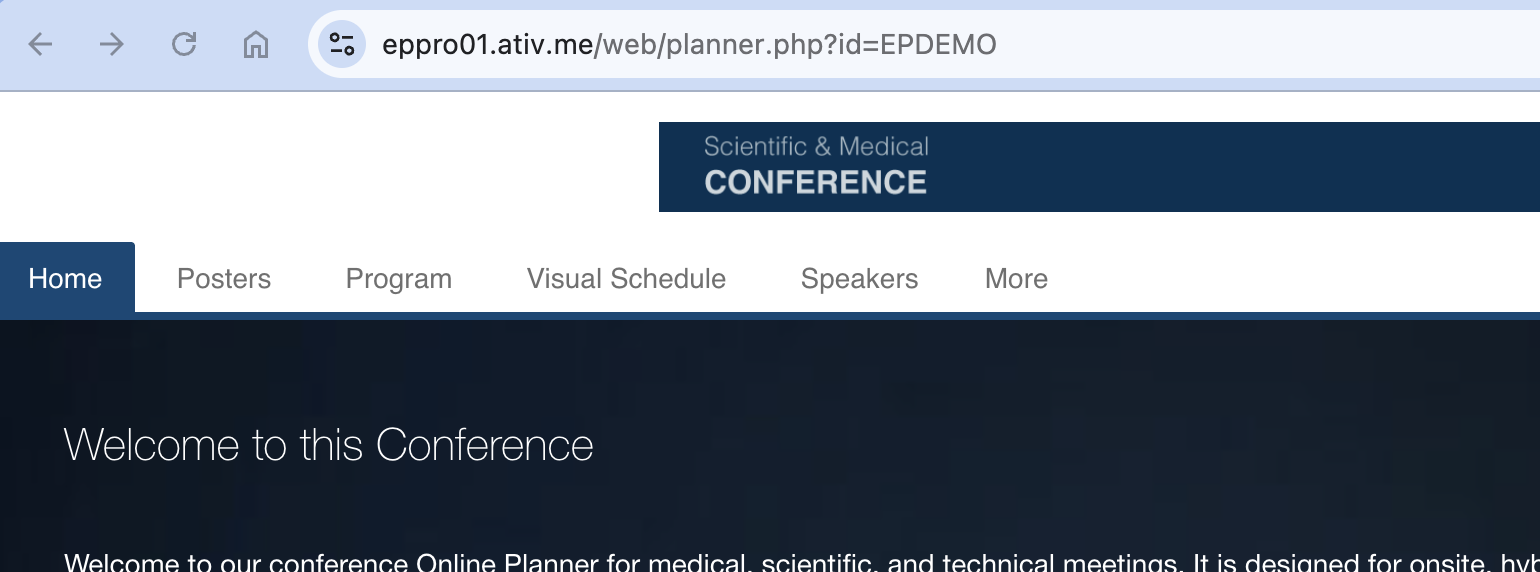
- Find the ID of your custom view
- In the App Builder, navigate to Design > Custom Views and find the view you'd like to link to
- On the right hand side, you will see the ID of the custom view

- Putting it all together
- Fill in the server, CONFID, and custom view id
https://server.ativ.me/web/planner.php?id=CONFID&table=custom&tid=customviewid
https://eppro01.ativ.me/web/planner.php?id=EPDEMO&table=custom&tid=chatjobs
- Fill in the server, CONFID, and custom view id
- Try it out
URL to a specific session (or a set of sessions), speaker, exhibitor, or abstract in the Itinerary Planner
For marketing purposes, you may want to link directly to a specific session / speaker / exhibitor / abstract in the Online Planner. With a special link, the Online Planner can open the detail view for an item overlaid while giving easy access to the full planner (simply click outside the overlay to access the planner).
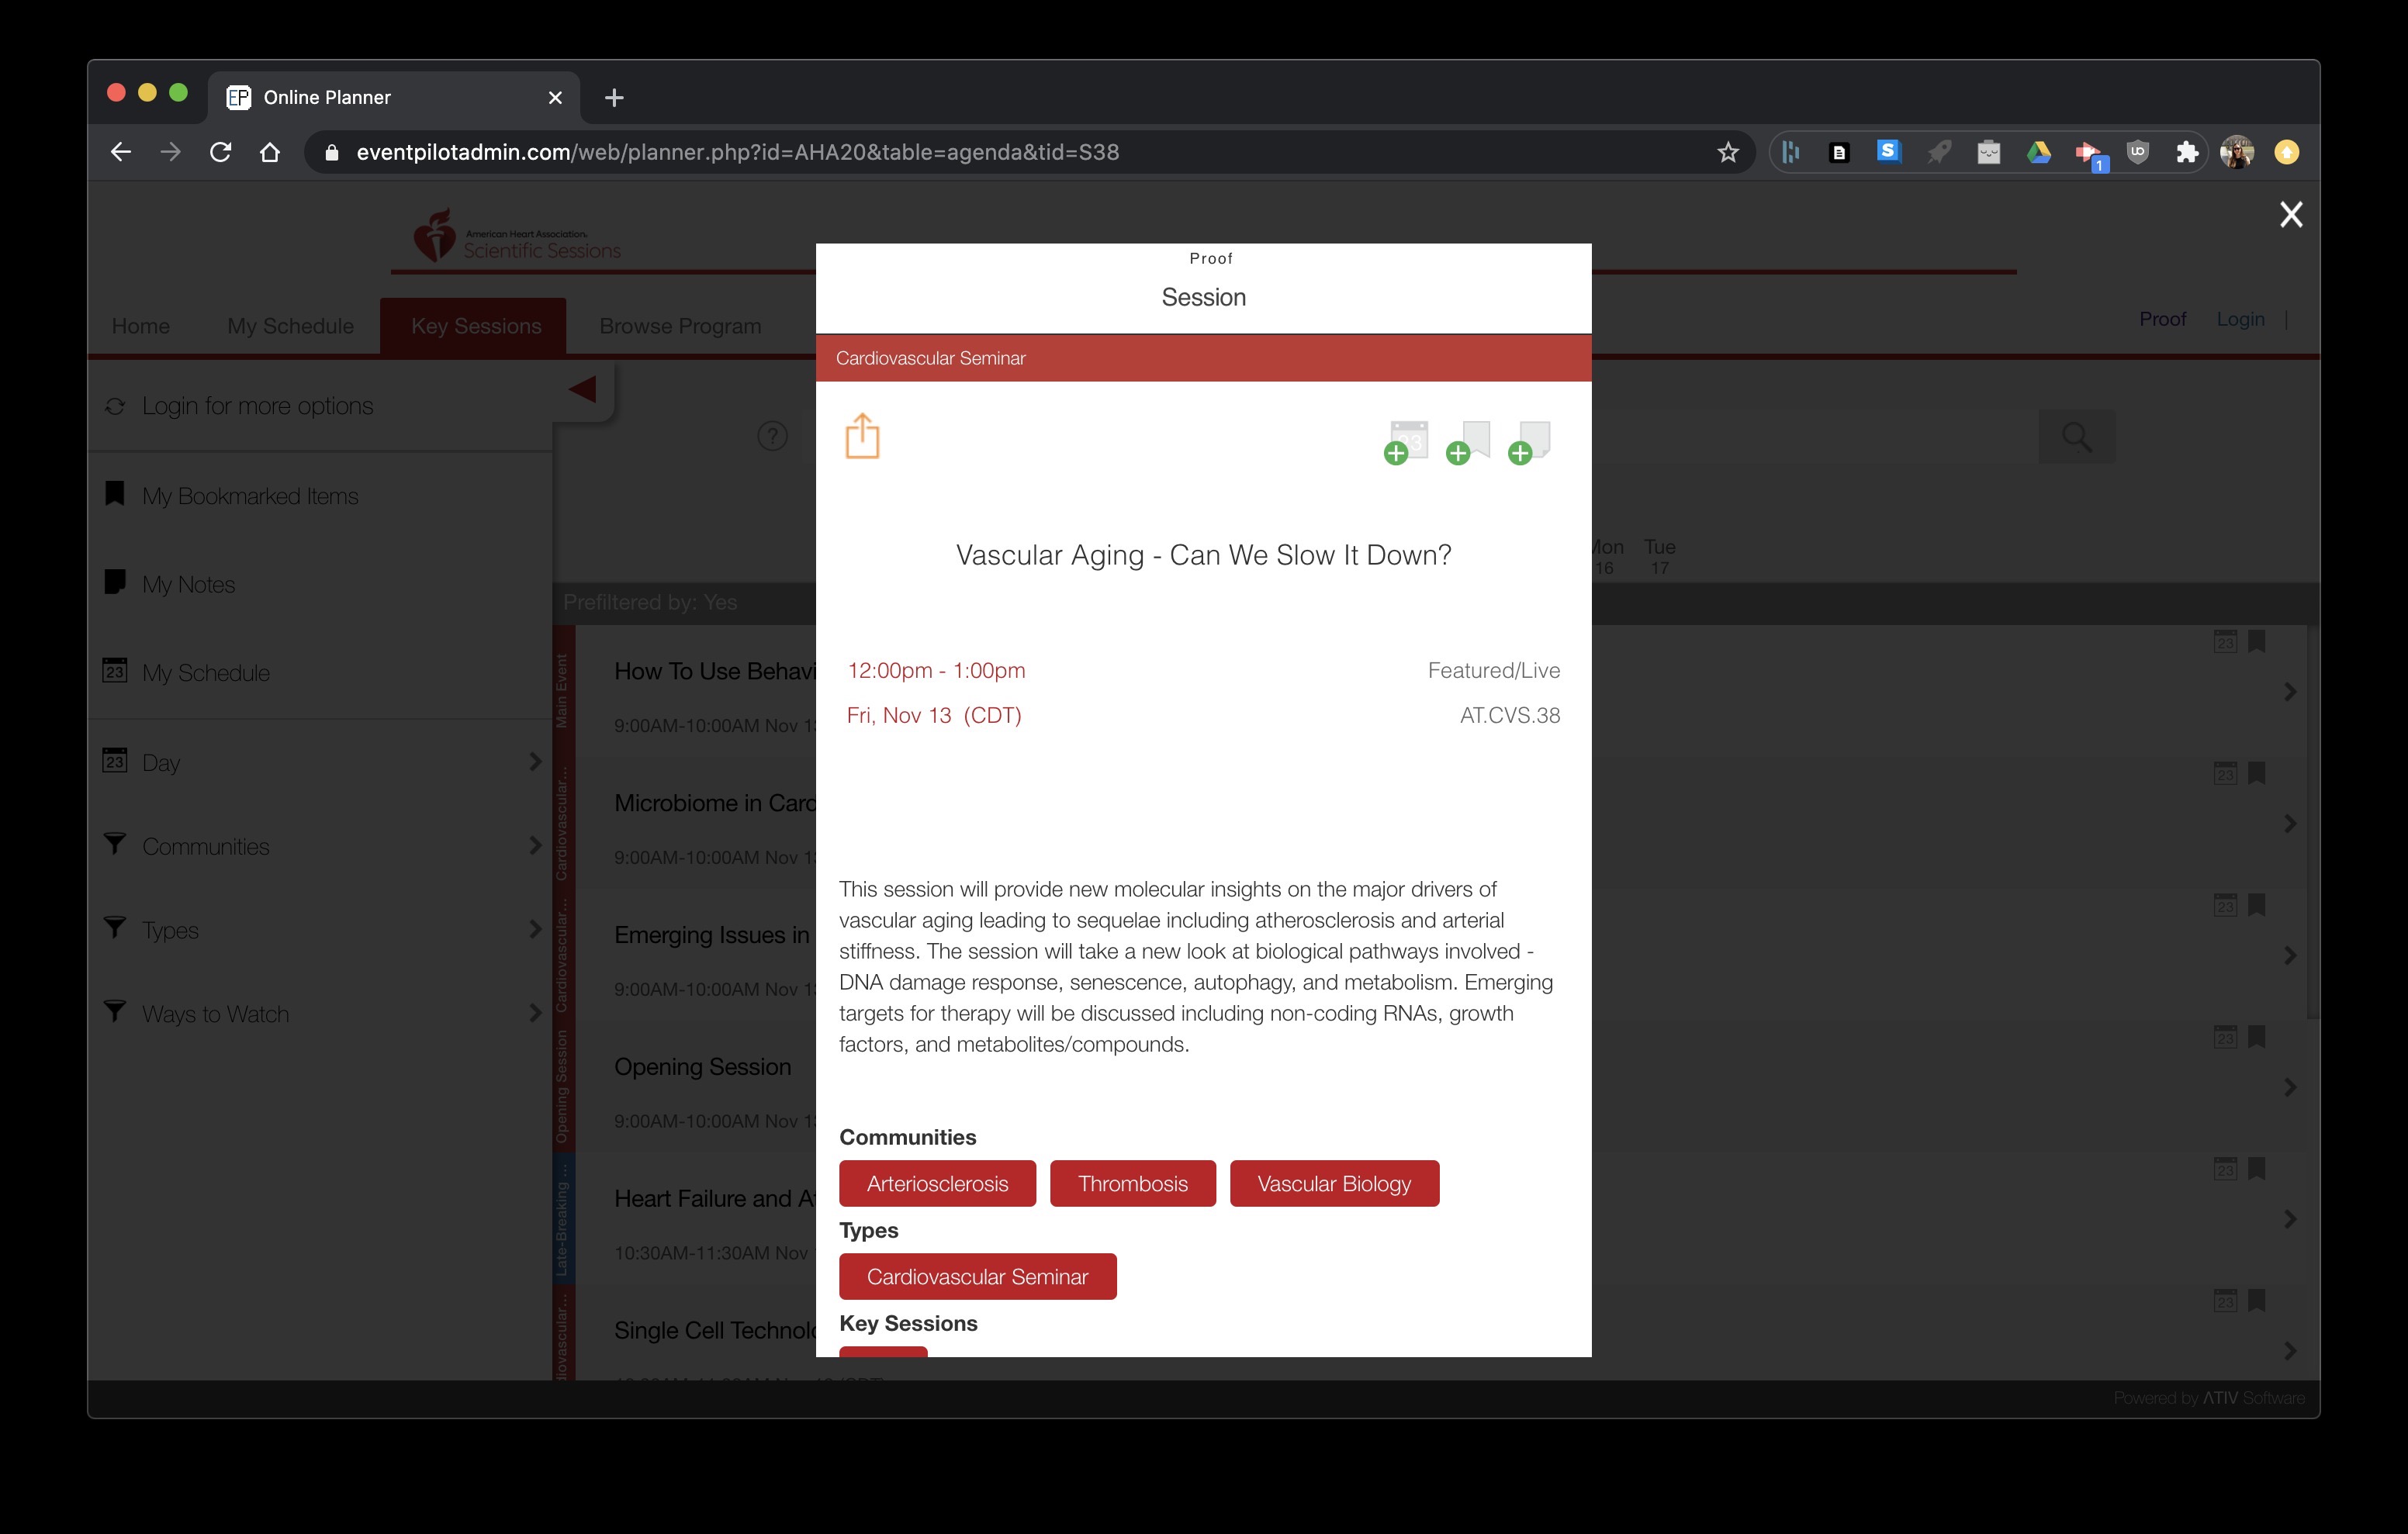
You can modify your Online Planner URL to open to a particular item by following these steps:
Look up the ID and Table
- In the Conference App Builder (CMS), open the tab that has the content you ultimately want to link to e.g.
- Agenda sessions
- Speakers
- Exhibitors
- Search for the actual record to find the item's unique ID
For example: you want to go to the session called Vascular Aging - Can We Slow It Down? - go the Agenda Sessions tab and search for the title and find the item ID displayed on the right hand side below the edit symbol. In this case S38. Note: record IDs are case sensitive, so you must use S38 and not s38.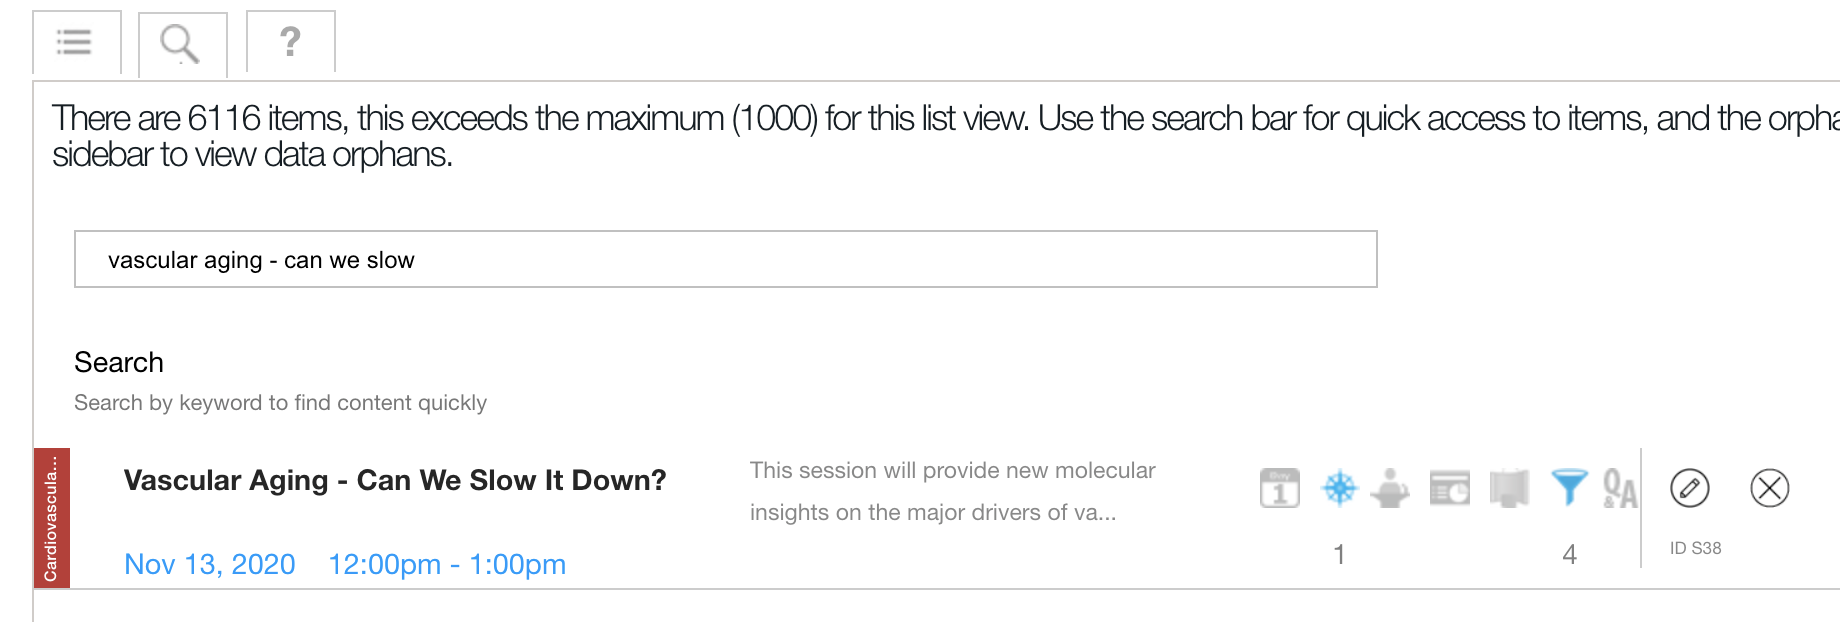
Build Your URL
Single Record
- Open your Planner link and copy / paste the URL. For example:
https://eppro01.ativ.me/web/planner.php?id=ABC27
Ensure you copy your own planner link as the domain could be different from the example above. - Then add the following two parameters:
- &table=
possible tables are:
agenda
speakers
exhibitors
In our example, we were looking for a session, so we use agenda - &tid= where you add the item ID you looked up earlier which was S38 in our example
- &table=
- Let's put it all together into one URL:
https://eppro01.ativ.me/web/planner.php?id=ABC27&table=agenda&tid=S38
List of Sessions or Exhibitors
Multiple Sessions
For a list of multiple sessions, add the individual IDs using a pipe separator:
https://eppro01.ativ.me/web/planner.php?id=ABC27&table=agenda&tid=S38|P2323|A1341|D101
Multiple Exhibitors
For a list of multiple exhibitors, add the individual IDs using a pipe separator:
https://eppro01.ativ.me/web/planner.php?id=ABC27&table=exhibitors&tid=1001|5001|3498
Single Abstract in the Planner
If you need to link to an abstract, use table=IntHtml
e.g. https://eppro01.ativ.me/web/planner.php?id=ABC27&table=IntHtml&tid=101
Please Note: Linking to media items is only supported for items of type int/html. All other items, you must link to the session or exhibitor who have the media item in their detail view.
FAQ
Can I disable a planner tab and still link to it?
The links can only function to open active or visible tabs. So if you toggle the specific tab to OFF in the Planner Tabs page in the Conference App Builder, then your link will not open as you effectively removed the tab.