To review the specific set up for your project, please speak to your Project Manager as this may not apply to your event.
Maritz allows attendees to opt out of releasing information during the registration process, which changes first and last names to OPTOUT in the Maritz attendee data. Opted out attendees are blocked from logging into the app and are not included in the attendee list.
Impacted data sets:
- Attendee List
- Authentication
In order to log into the app or to appear on the attendee list, attendees need to change their setting in Maritz. Please inform your attendees how to change that setting or who to contact if they are unable to login.
Test the login experience using an opt out registration - the system should display an error message specific for the reason why the user cannot log in and to change their opt out to opt in.
3 Tips to Communicate Opt In
1) Display prompt during registration
Contact your Maritz account manager to request displaying a prompt when a user chooses to opt out. The prompt would include text to inform the user that they will not be able to log into the event platform or mobile app unless they opt in.
2) Opt In consent to share data with the mobile app vendor
Check with your registration vendor to include a specific data transfer consent on your registration page like this:
Mobile App Consent
We offer a mobile app that provides attendees with general conference information, a detailed schedule of events, the ability to build your schedule, and more. In order for you to access the mobile app, the following data needs to be transferred to the app and therefore to the third party vendor that develops that app:
- Email address
- First name
- Last name
- Registration number
By checking this box, I consent to allow the transfer of my Personal Information to the 3rd Party Vendor and for the use of the same by the 3rd Party Vendor to provide the above-described services. I understand that if I do not check this box, I will not have access to the mobile app.
[] I wish to use the mobile app and virtual platform and I give consent to the data transfer.
3) Customize the EventPilot login screen
- Log in to the Conference App Builder and navigate to Settings > Auth Settings
- You should see Authentication Type: Registration Provider Maritz API
- Click the Edit icon
- Jump to step 3 Instructions
- Update the instructions that appear in the app's settings page
- Settings page - text appears above the loving button:

- Login Instructions - text appears above the actual login:
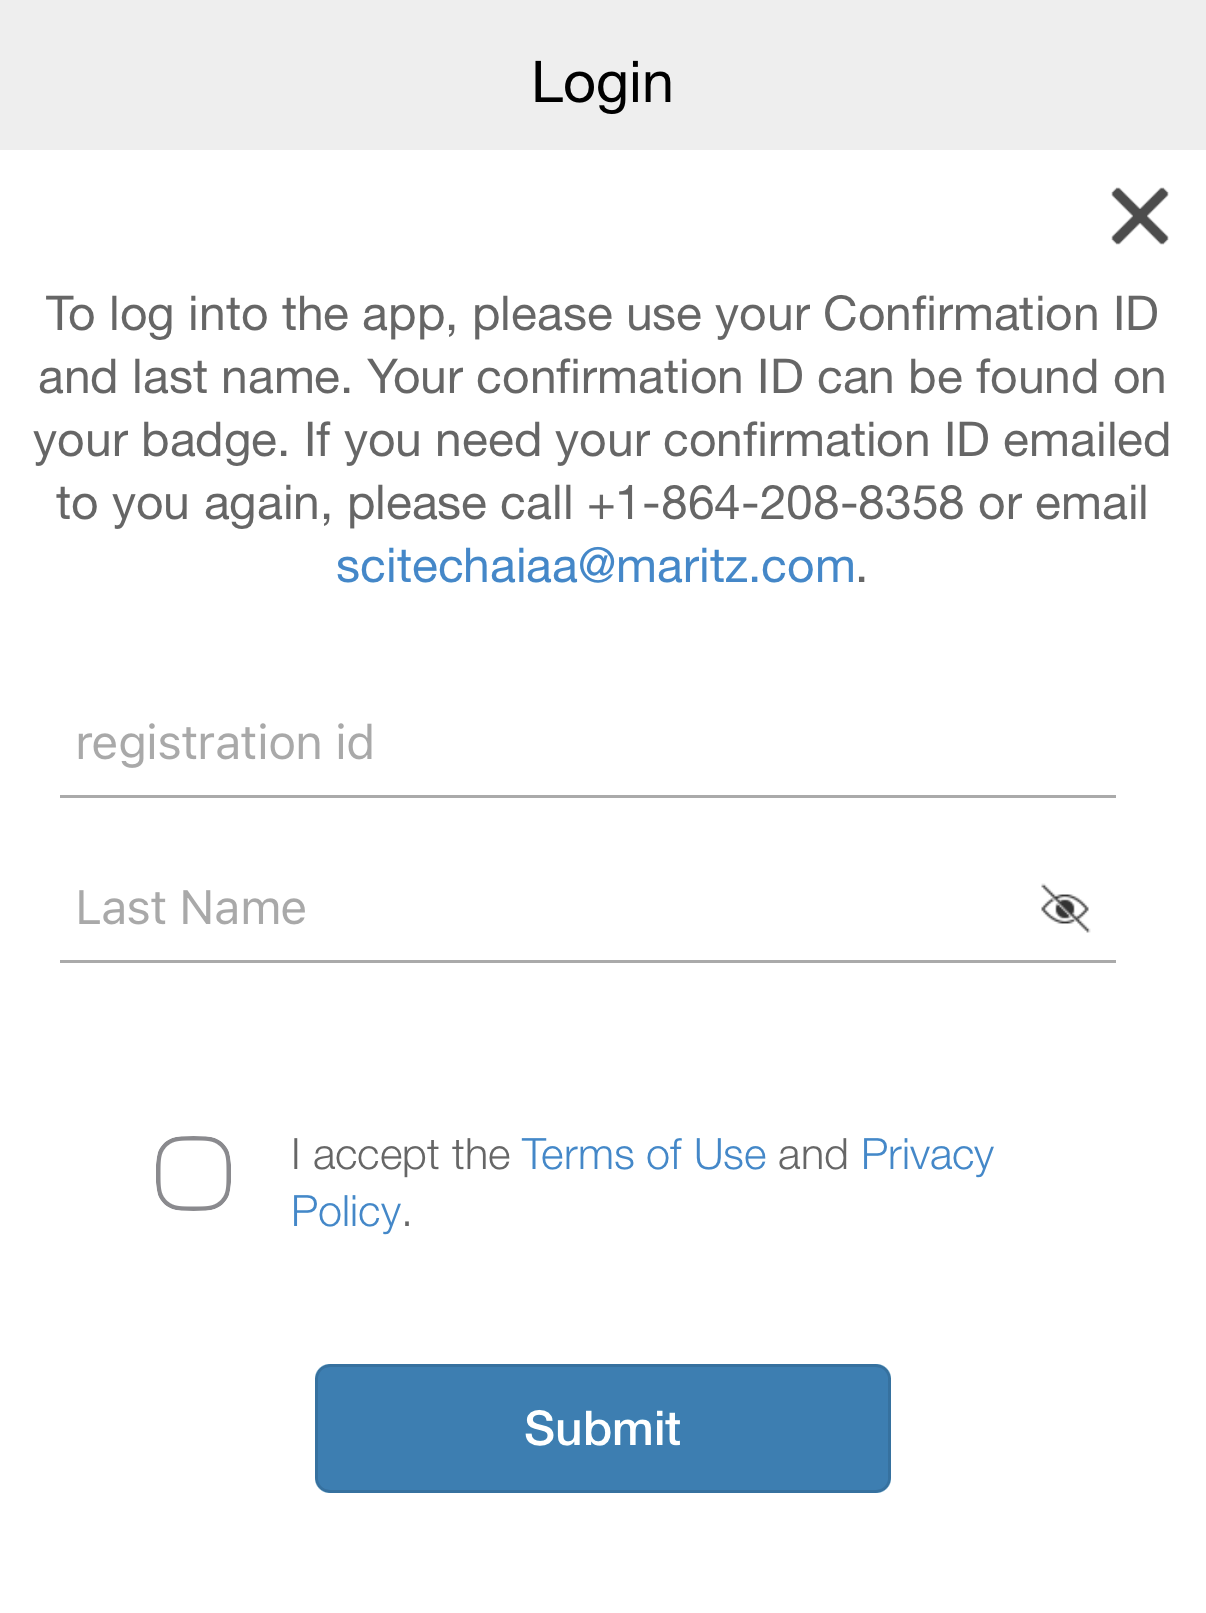
- Settings page - text appears above the loving button:
- Fill in the Username Hint Text (e.g. Registration ID)
- Fill in Password Hint Text (e.g. Last Name)
- Click Done
- Publish a data update
Sample text to add for Maritz:
Note: If you selected opt out for data sharing (GDPR) during your registration, you will not be able to log into the app. Please update your setting by accessing your registration online or submit a ticket for assistance.
Link the text submit a ticket to this website (use external browser option)
https://ews.experientevent.com/realtimeservices/help.html